7 Yin Yoga Exercises
Self-Care and Renewal with Yin Yoga

Yin yoga is a relatively new practice style in the yoga world. Elements of classic Hatha yoga are combined with the basics of meridian theory, as it is taught in traditional Chinese medicine.
In particular, Yin yoga focuses on relaxing and calming down. In addition, body perception and self-reflection are emphasized.
Prior to the start of any practice, you should consult a doctor or therapist. If you have uncertainties or questions regarding the performance of the positions, take a couple of Yin yoga classes under the instruction of a qualified teacher.
You should hold each asana for a short period of time to start with – about 2 minutes – and increase this slowly and gradually, as long as your body tolerates it. Too little demand on the body reduces effectiveness at all levels of practice; too much demand can lead to restlessness.
Search for a couple of quiet minutes for your Yin practice, a time window in which nobody disturbs you and your mobile phone can remain switched off. As aids, you can use blankets, pillows and books; yoga bolsters and blocks are not necessarily required. Practice on a stable floor and a blanket or yoga mat. Nice music can help you to let go, and with a candle you may be able to create a little "island" of relaxation in your everyday life.
Start with short asanas (about 2 minutes) and observe how your body reacts. The longer you have held a position, the slower and more mindful you should be when coming out of it. After stress, the tissue needs time to return to its initial state. Leave the muscles as uninvolved as possible. During practice, observe your breath and the sensations in your body. In this way, you will bring your attention back to “here and now” and remove energy from mostly unconscious, endless thoughts.
Exercise 1: Rotated child's pose with wide open knees (right and left)
Sit on your heels and open your knees as far as you can with it still feeling comfortable. Bend forward slowly and rotate the upper body to the right until the left shoulder and temple are lying on the floor or a blanket. You can prop up your right arm next to your face, pull it long over your head or grasp around your back to your left thigh. Practice the same on the left side. Then, lie on your stomach.
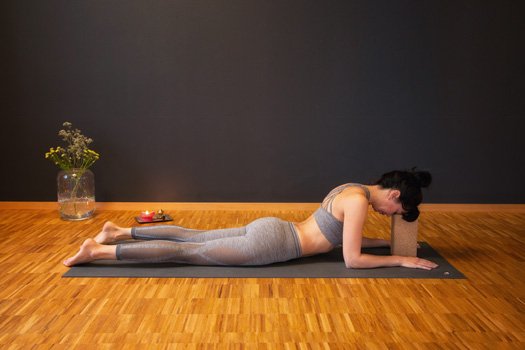
Exercise 2: Sphinx
From lying on your stomach, move your elbows under your shoulders; your forearms touching the floor, your palms are on the floor. Let your chest open and your spine come into a gentle back bend. Your head may sink forward, your forehead can rest on a block, a cushion, folded blanket or similar. Let your feet fall apart slightly wider than hip-width apart, especially if you feel a strong compression in your lower back. Relax lying on your stomach for a couple of moments.
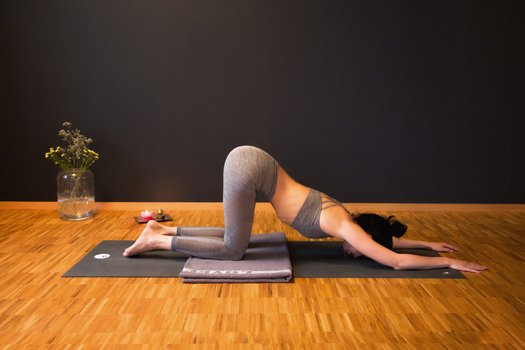
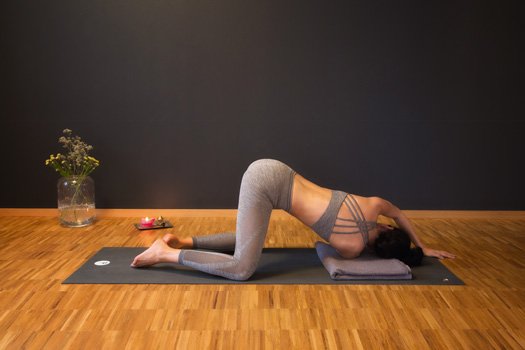
Exercise 3: Heart-opening position
If you have sensitive knees, place a blanket underneath them. Bring your hips above your knees (table top position) and walk your hands slowly forward until your forehead touches the floor. Let your sternum melt towards the floor. If your fingers start to tingle, place your arms further apart. Go into child’s pose.
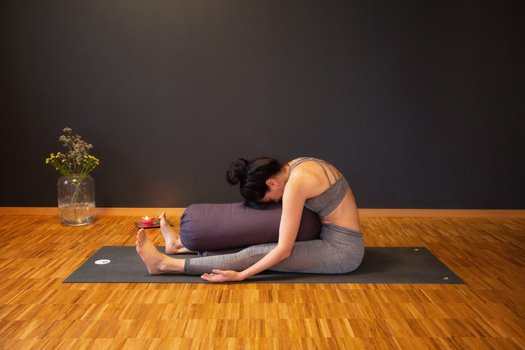
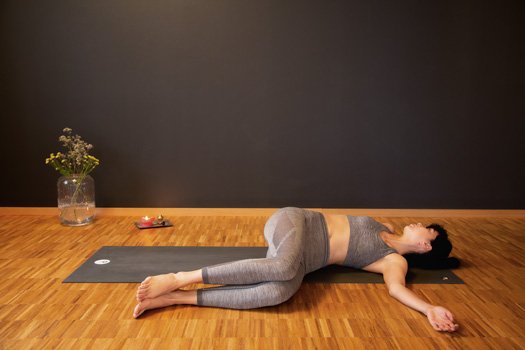
Exercise 4: Caterpillar
In this sitting, bent-forward position, round your back. If you have any lower back problems, keep the lumbar region straight and only round your upper back. Place your forehead on the bolster/blanket/block. You may open your feet hip-width apart, letting your toes fall outwards or inwards. You might want to open the palms of your hands towards the sky. Then lie on your back.
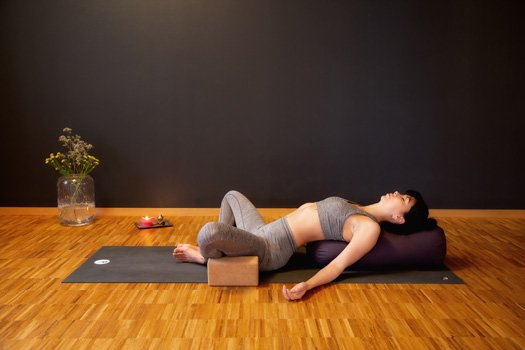
Exercise 5: Lying butterfly
Place the soles of your feet against one another while seated and bring your heels closer towards your buttocks. Place a rolled-up blanket or a yoga bolster behind you, keeping a hand-width distance to the sacrum. Now slowly lie back over your elbows on the blanket/bolster, your arms relaxed next to your body, at shoulder height or even above your head, depending on the intensity you want. You can slide a block or books under both knees or thighs if the intensive hip opening is causing you any difficulty. Then relax into a neutral position lying on your back.
Exercise 6: Supine twist (right and left)
While lying on your back, bend your legs so that your lower legs are parallel to the floor (right angles in the hip and knee joints). Spread your arms out to the right and left and let your legs slowly sink to the right until the right knee touches the floor. If it is more comfortable for you, lay a blanket under your knee. Change sides here, too.
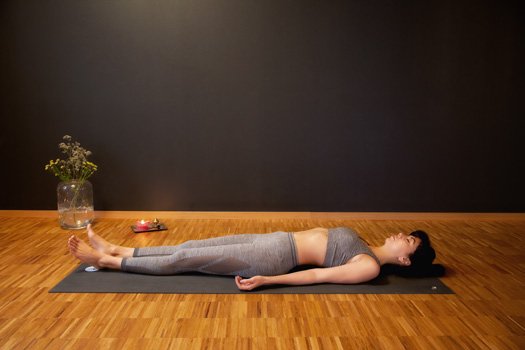
Exercise 7: Relaxation position (Savasana)
If you have any difficulty lying flat on your back, slide a bolster or a rolled-up blanket underneath your knees, which will relieve your lower back. Cover yourself with another blanket to prevent your body from cooling down further. Let your feet fall hip-width apart, your arms next to your body, palms opened upwards, or place your hands on your stomach. Let your breath flow freely and imagine yourself sinking further into the ground with every exhalation. Relax your entire body, especially your jaw and face. Linger in this resting position as long as it’s comfortable for you.
Related: Love yoga? Try these 3 simple poses for everyday mobility and strength-building.