Fit to be Tied
How to create 3 fashionable looks with Amoena headscarves
The beauty of wearing a headscarf is its simplicity -- and the fun of wearing a headscarf? Variety! Make it casual with the ribbons hanging in the back, or make it high-style with an "up-do" floweret. You bring the confidence and personality, and choose from gorgeous prints or great-looking solids.
Amoena scarves are designed with a "cap" to fit perfectly on the crown of your head. Start each of these looks with the headscarf comfortably on your head, ribbons hanging loosely in the back. There's no complicated folding or twisting and these variations should remain secure with little fuss.
Relaxed and Easy
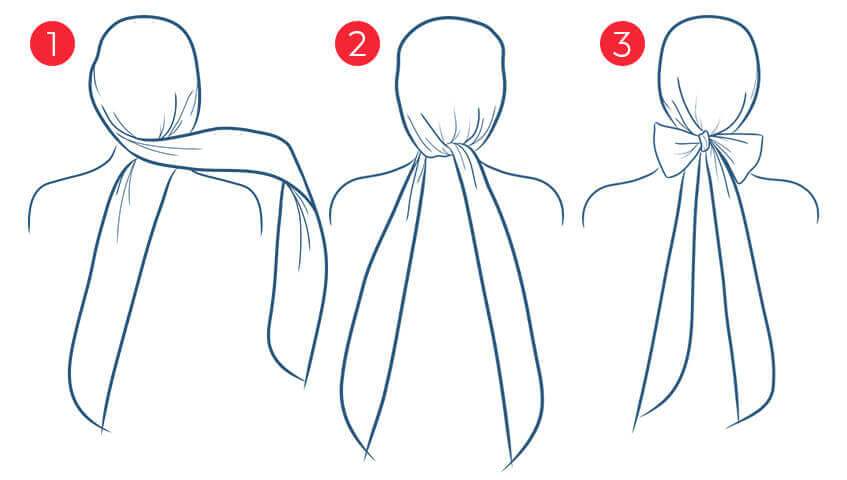
1. Cross the ribbons behind your head. 2. Tie into the beginning of a knot. 3. It couldn't be simpler: Make a bow. Position the ribbons hanging down your back or over your shoulder.
Around Town
To get this look, begin with Step 1, above; then wrap one ribbon around your forehead, keeping it flat. 2. Bring the long ribbon from the back and cross over the shorter ribbon to make your first knot.
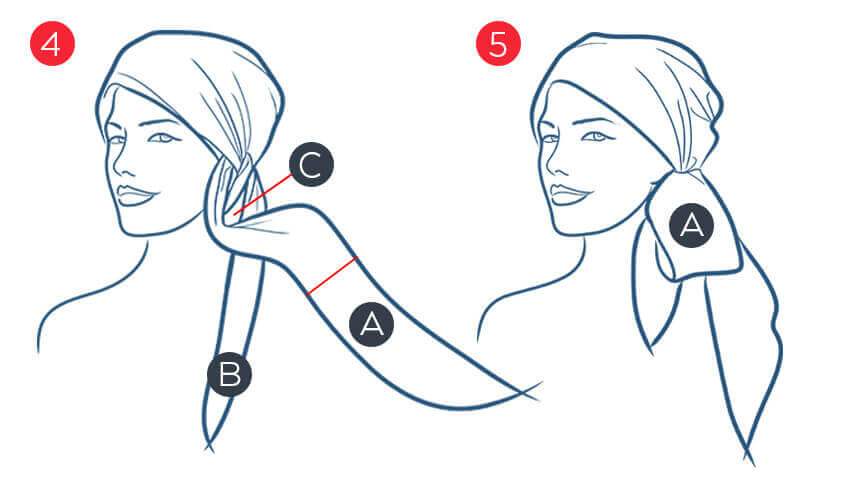
4. Fold ribbon A as shown and tuck ribbon A under ribbon B, and through hole C. 5. Pull the folded ribbon A through to the desired length, leaving it folded.
Create a Flower
For a nighttime event or just a different twist, try this clever floweret. Begin with Steps 1 and 2 from "Around Town," then:
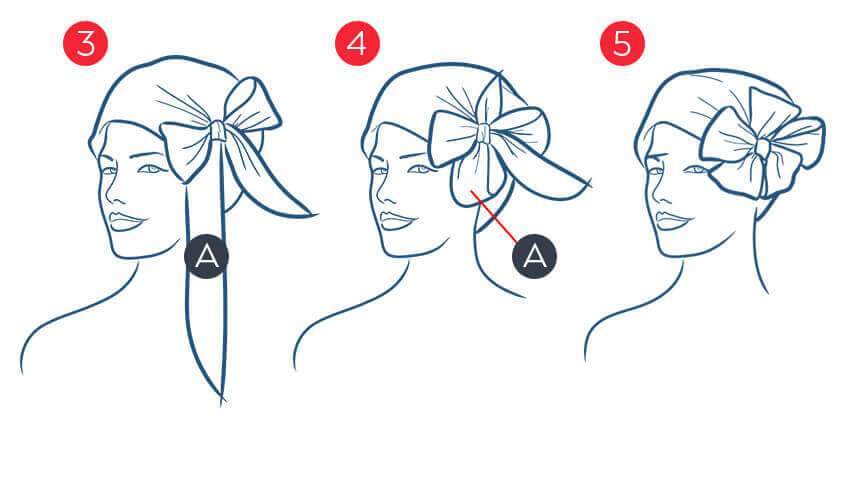
3. Tie a knot near your temple and make a bow, keeping the loops even and fairly short. 4. Tuck ribbon A behind the knot, as shown, to make a third loop. 5. Fold the remaining ribbons and tuck them behind the knot to complete the loops of your flower. Position as desired.
With these headscarf looks from Amoena, you'll be comfortable and stylish for every day!